Collecting data from your clients' accounting systems using Strongbox
If you haven't already created a workspace for your project, see our Creating a New Workspace article first
After you have created your workspace and granted access to the necessary users, you're ready to start a new collection!
You can click on the New Data Collection button next to your chosen workspace in your Workspace List:
Or, you can also click on your workspace name to open up that specific space and there is a New Data Collection button there as well:
Next, you can now select the parameters of your collection:
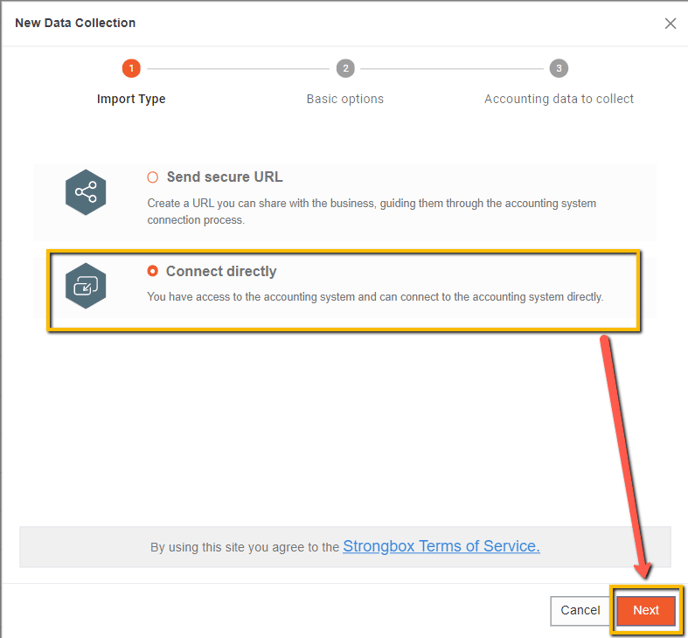
1. Method of Collection
a. Secure URL
In some instances, such as with assessments, your client won't need to give you direct access to their accounting system. You can chose this option to have Strongbox generate a URL that you can copy and send to your client/target in order to gather their data.
b. Connect Directly
This method is possible if you have been granted access to your client's accounting system(s).
After choosing Secure URL or Connect Directly, click on the Next button to move to the next step.
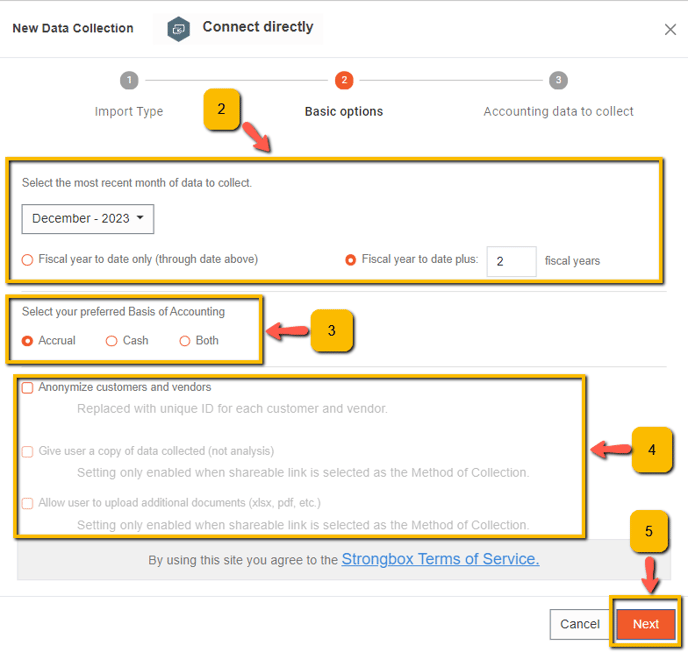
2. Most Recent Month plus previous Fiscal Years
Strongbox defaults to the most current month, but you can choose a previous month and specify how many fiscal years in addition to the current FY that you want to gather data from.
3. Preferred Basis of Accounting
You can choose between Accrual, Cash, or Both. NOTE: Strongbox doesn't recommend using Cash or Both unless you know QuickBooks is configured for it.
4. Additional Options
a. Anonymize customers and vendors
If you prefer to anonymize your customer and vendor data, you can select this option.
b. Give user a copy of data collected
This option is only available when sending a secure URL to your client but it allows for the client to request a download link to a copy of the reports that were shared with Strongbox.
c. Allow user to upload additional documents
This option is also only available when sending a secure URL to your client and that is because if you connect directly, you should have been given access to all or most of their necessary files. They won't need to upload anything additional for you on their end.
5. Next
Once you click on the Next button, you can move onto selecting the accounting data you would like to include in your collection.
6. Choose the data you want to include in your collection
You can choose to include or not include financial statements and/or transactions, especially if the company you are connecting to may have a large collection of transaction data that may slow down the generation of workbook output.
Once you click the Next button, if you have selected the secure URL method, Strongbox will generate a link for you to share with your client. If you have selected to connect directly, a Strongbox pop-up window will open to allow you to choose the accounting system you want to connect to.
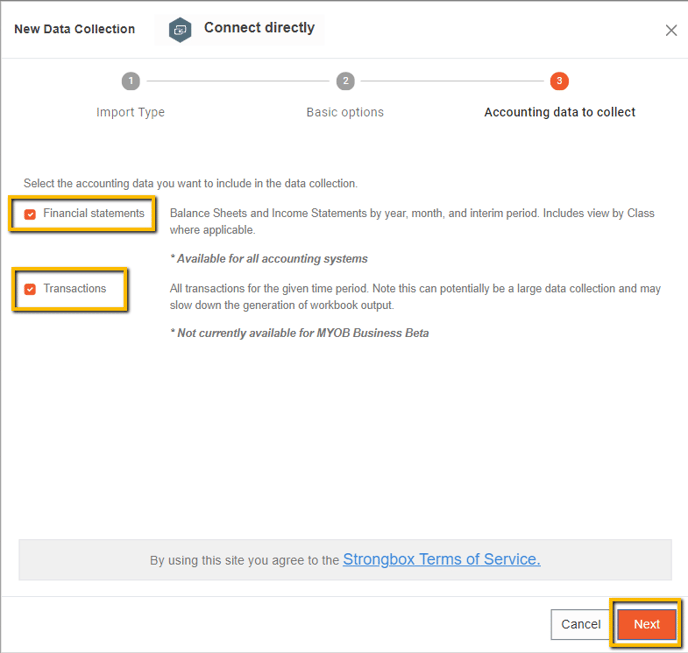
For more specific details on connecting to each accounting system, please see our Connecting to Accounting Systems Help Center articles.
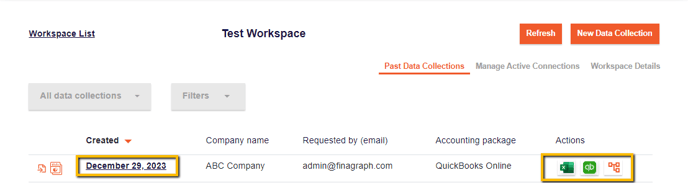
7. Download Workbooks
Once Strongbox completes the collection of data, at the top of your page, you will see a Refresh button  and you can click to refresh your workspace. You should see that you have an entry for your New Data Collection!
You can now click on the date of your collection or the Excel icon to access and download the workbooks that were generated.